 Pin it
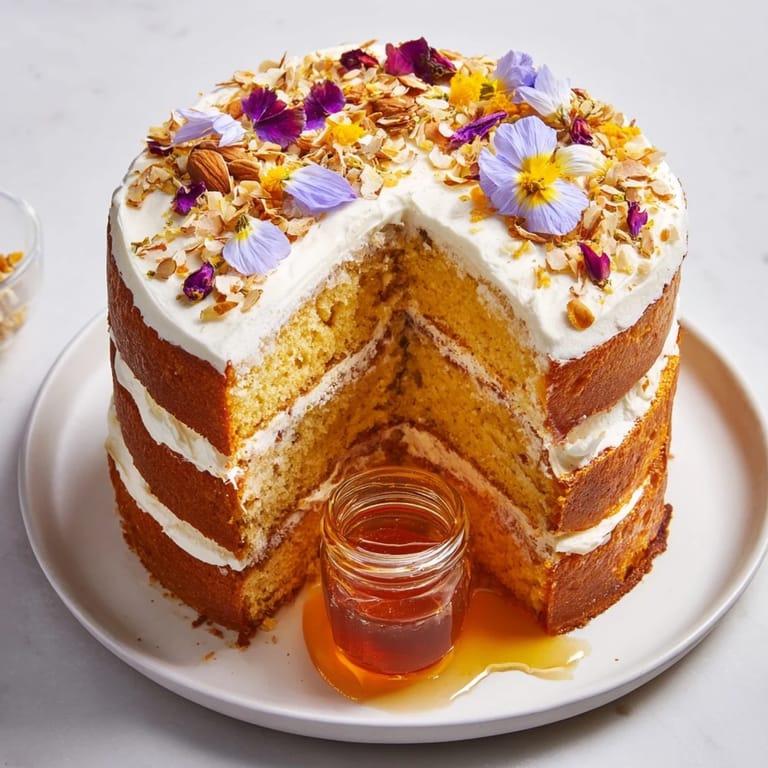
 The first time I watched honey melt across a warm plate, I became obsessed with the idea of building an entire dessert around that moment. There's something almost theatrical about honey in its liquid state—the way it catches light, how it moves with its own rhythm. This cake came from wanting to create that spectacle at the center of a dinner table, surrounded by layers of tender, honey-sweetened cake that guests could tear into and dip with abandon.
I made this for a dinner party during late autumn when the kitchen felt too quiet. Someone's eight-year-old watched the whole process and asked if we were building a trap for sweetness—I still think that's the most accurate description I've heard. When we placed that first slice in front of them, their eyes went wide before they could even taste it.
Ingredients
- All-purpose flour: Two cups creates a tender crumb that won't overpower the honey's delicate flavor, so don't skip the measurement.
- Baking powder and baking soda: Together they lift the cake into something feather-light, crucial when you're building thin layers that need to hold their shape.
- Unsalted butter: Half a cup, softened, is your foundation—it needs to be genuinely soft so the honey incorporates without breaking.
- Honey: Half a cup in the batter plus a full cup for the center means you're really committing to the theme; pick single-origin honey if you can, the flavor comes through.
- Eggs and vanilla: Three eggs bind everything, and vanilla adds a whisper of warmth that prevents the honey from feeling one-dimensional.
- Whole milk: Three-quarters cup keeps the batter loose enough to pour evenly, preventing dense pockets.
- Heavy cream and mascarpone: This filling is where the magic lives—cream whipped just to stiff peaks with honey and mascarpone creates something between clouds and silk.
- Toasted almonds: Quarter cup chopped means texture that contrasts beautifully with the soft layers, and toasting them first deepens their flavor against all that honey.
- High-quality liquid honey: This is the show-stopper, so don't economize here—wildflower or acacia honey will make this dessert shine.
Tired of Takeout? 🥡
Get 10 meals you can make faster than delivery arrives. Seriously.
One email. No spam. Unsubscribe anytime.
Instructions
- Set your stage:
- Preheat to 350°F and prepare two 8-inch pans with parchment and a light grease. This matters because honey cakes can stick stubbornly if you don't.
- Build the dry base:
- Whisk flour, baking powder, baking soda, and salt together in one bowl—this distributes the leavening evenly so every slice rises the same way.
- Cream butter and sugar:
- Beat them for about three minutes until the mixture looks pale and almost fluffy; rushing this step results in a denser cake that won't have that tender crumb you're after.
- Bring it together:
- Add honey, eggs, and vanilla to the creamed butter, beating well after each addition so everything emulsifies smoothly. If you dump it all in at once, you risk a broken batter.
- Layer in the wet and dry:
- Starting and ending with dry ingredients, alternate them with the milk while mixing on low speed—overworking develops gluten and tightens the crumb.
- Bake with intention:
- Divide batter evenly between pans and bake 22 to 25 minutes until a toothpick comes out clean. Honey-sweetened cakes brown quickly, so watch them toward the end.
- Cool completely:
- This isn't negotiable—warm cakes slice into mush, so give them time on the rack.
- Whip the cream filling:
- Heavy cream to soft peaks first, then fold in honey and mascarpone and whip to stiff peaks. The mascarpone adds tang that balances the honey's sweetness beautifully.
- Create thin layers:
- Slice each cooled cake horizontally to make four layers total—a serrated knife helps here, and a lazy Susan makes rotation easier.
- Stack with intention:
- Layer cake, filling, cake, filling, building something that feels deliberate rather than haphazard.
- Cut the center:
- A 3-inch round cutter removes a hole where your honey pot will sit—go straight down and twist gently to avoid crumbs falling inside.
- Place the honey pot:
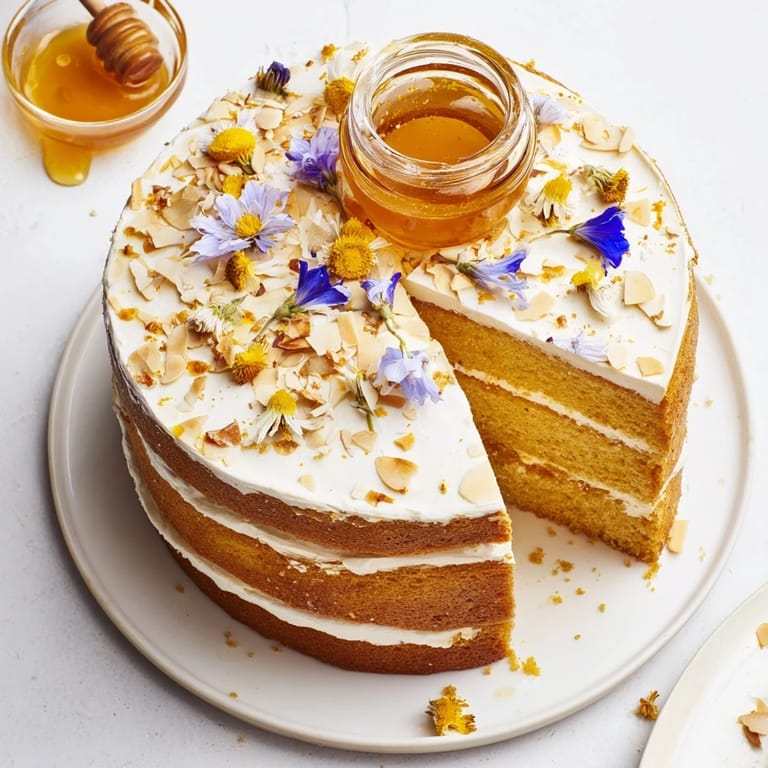
- Nestle your small glass or ceramic vessel into that center hole and fill it with your finest honey just before serving.
- Finish with flourish:
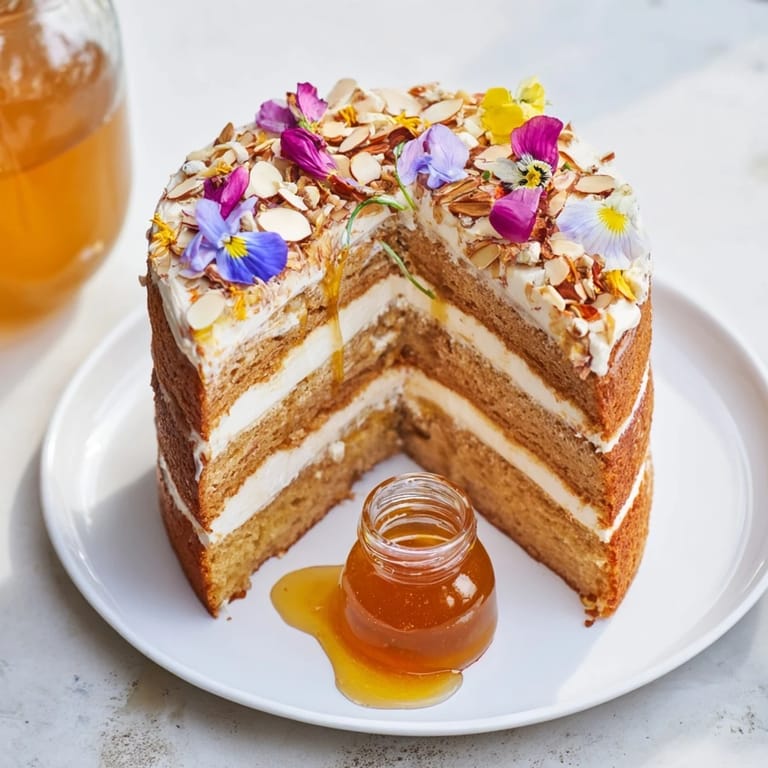
- Scatter toasted almonds across the top, add edible flowers if you have them, and drizzle honey around the outer edge for visual drama.
 Pin it
 What struck me most was how this dessert transformed a regular evening into something guests remembered months later. People don't forget the moment they watched golden honey move across their plate, how they debated the exact temperature at which to dip their fork. It became the reason someone called to ask for the recipe, or why they texted photos when they eventually made it themselves.
Choosing Your Honey
Not all honey tastes the same, and this recipe proves it. Wildflower honey brings complexity and a subtle floral note, while acacia honey stays pale and mild, letting the cake's vanilla shine. The type you choose changes the entire personality of the dish, so don't treat this as an afterthought. A local beekeeper's honey tastes nothing like grocery store honey, and if you've never tried the difference, this is the moment to experiment.
The Art of the Presentation
This dessert works because of how it looks first and tastes second. The honey center creates a focal point that draws every eye at the table, and there's something almost ceremonial about serving it. When you slice into it, the layering should be visible—four distinct cake layers with honey cream between each one, something that makes people lean forward to see better.
Variations and Personal Touches
Lavender honey swapped in creates an entirely different mood, something more floral and subtle. If almonds aren't your thing, hazelnuts offer deeper earthiness, and pistachios add unexpected color. The edible flowers aren't necessary but they signal that this is a special occasion dessert, the kind you make when you want to impress someone or celebrate something worth remembering.
- Orange blossom honey transforms this into something with Mediterranean warmth and a hint of citrus whisper.
- Toast your choice of nuts ahead of time so the oils release and the flavor deepens.
- Make the cake layers a day ahead and store them wrapped at room temperature, which gives you breathing room on serving day.
 Pin it
 This cake reminds me that sometimes the best recipes aren't about perfection—they're about creating a moment where food becomes theater, where honey becomes something beyond just sweetness. Make it when you want to feel like you're sharing something special.
Recipe FAQ
- → What type of honey works best for the liquid center?
Wildflower or acacia honey are ideal for a smooth, fragrant flow that complements the cake’s delicate sweetness.
- → Can almonds be omitted for allergies?
Yes, almonds are optional and can be left out to accommodate nut-free preferences without compromising flavor.
- → How do I create even cake layers?
Once baked and cooled, slice the cake horizontally using a serrated knife to create uniform thin layers for stacking.
- → What alternatives enhance the floral notes in this dessert?
Using orange blossom or lavender honey adds subtle floral complexity, enhancing the overall aroma and taste.
- → What beverage pairs well with this dessert?
Sweet wines like Moscato or late-harvest Riesling beautifully complement the honeyed sweetness and creamy textures.