 Pin it
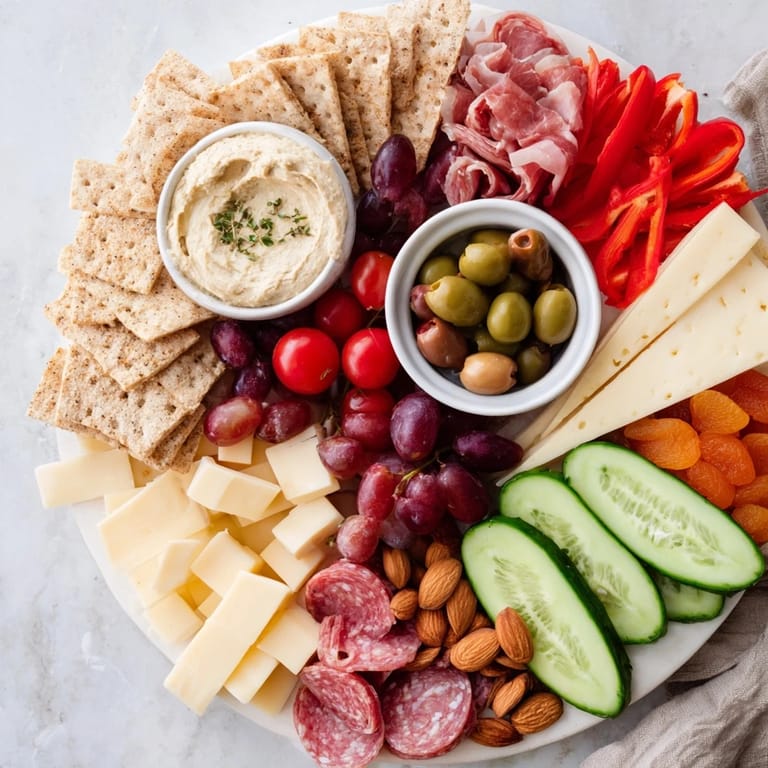
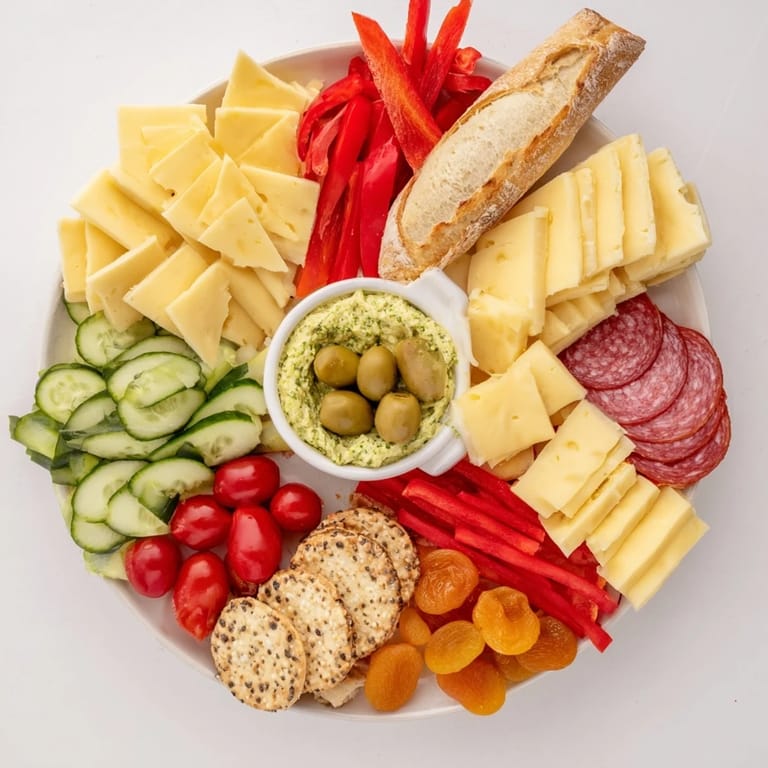
 I remember the first time I arranged a charcuterie board that actually made people stop and stare. It wasn't just about throwing beautiful things on a board—it was about creating a visual story that guided everyone's eyes and hands in one delicious direction. That's when I discovered the magic of the arrowhead board, where every element points like an arrow toward the dip at the center. It transformed a simple appetizer into an edible design that felt intentional and impressive, yet surprisingly easy to pull together.
I'll never forget hosting my sister's book club and setting out this arrowhead board for the first time. As everyone arrived and saw it, they genuinely gasped. One friend asked if I'd taken a design course. The best part? They spent the whole evening naturally gathering around it, following the visual arrows toward that creamy dip in the center, and it somehow made the whole evening feel more intentional and connected.
Ingredients
- Aged Cheddar (100 g): Cut into triangles that naturally point inward—the sharpness and golden color anchor the board and guide the eye beautifully
- Brie (100 g): Slice into wedges that fan toward the center like a compass rose; the creamy interior creates visual softness against harder cheeses
- Gouda (100 g): Cut into strips that follow your directional lines; its caramel undertones add warmth to the overall composition
- Prosciutto (100 g): Fold gently into soft bundles that catch light and add delicate color variation; it's the visual punctuation between heavier elements
- Salami (100 g): Slice thin, then fold each piece into triangular shapes—they become mini arrowheads themselves, reinforcing the theme
- Seedless Grapes (1 cup): Cut into small clusters and lay them in lines between other components; their round shape and jewel tones create visual breathing room
- Cherry Tomatoes (1 cup): Halved to show their beautiful inner texture and arranged in radiating lines; they add brightness and freshness
- Cucumber (1 small): Slice diagonally so each slice has an angled edge that naturally follows your directional flow
- Red Bell Pepper (1 small): Cut into long strips that serve as natural arrows themselves, pointing exactly where you want them to
- Artisan Crackers (1 cup): Choose varieties with interesting shapes; arrange them so their angles point inward, creating texture variation
- Baguette (1 small): Slice on the bias so each piece has a natural diagonal—this cut was made for directional boards
- Marcona Almonds (½ cup): Scatter strategically in the gaps between major components; their buttery flavor and oval shape add sophistication
- Dried Apricots (¼ cup): Place them like colorful punctuation marks along your directional lines, adding sweetness and visual pop
- Olives (¼ cup): Use a small bowl and tuck it between elements; their dark color creates contrast and draws the eye forward
- Herbed Hummus or Whipped Feta Dip (100 ml): This is your arrow's target—place it at the focal point, and make sure it's in a beautiful bowl that complements everything else
Tired of Takeout? 🥡
Get 10 meals you can make faster than delivery arrives. Seriously.
One email. No spam. Unsubscribe anytime.
Instructions
- Establish Your Arrow's Target:
- Place your dip bowl at one end or corner of the board—this is your destination, the point everything will guide toward. Stand back and imagine invisible lines flowing from every corner toward this moment. If it's a 14 by 10 board, the bowl works beautifully in one corner or centered on one long edge.
- Create Your Cheese Compass:
- Fan out your cheese wedges and triangles from the opposite side of the board, with each piece's point angled toward the dip. Think of them as compass roses pointing home. Start with the larger pieces and work outward—you're building the structure that everything else will follow.
- Layer In the Proteins:
- Fold your prosciutto and salami into soft bundles and arrange them in gentle lines directed at the dip. These delicate elements should feel like they're floating on currents flowing inward. The folds catch light beautifully and add dimension to your composition.
- Paint with Vegetables and Fruit:
- Arrange your grapes in small clusters, halved tomatoes, cucumber slices, and pepper strips so they follow the directional theme. These should feel like brushstrokes all pointing the same way. Let their colors create visual rhythm—you're not just feeding people, you're creating a feast for their eyes first.
- Arrange Your Crackers and Bread:
- Lay crackers and bread slices in radiating lines, with each piece oriented to point at the dip. This is where the arrowhead theme becomes unmistakable. The various shapes and textures of different crackers add visual interest while maintaining that forward flow.
- Scatter Your Supporting Players:
- Tuck almonds, dried apricots, and olives into the gaps between main components, reinforcing the directional pattern. These smaller elements are like the decorative feathers on an arrow—they fill spaces but also strengthen the overall design.
- Step Back and Adjust:
- Take a moment to view your board from above and from the angle guests will see it. Fill any awkward gaps, balance the colors so no single area feels too heavy, and make sure that directional flow still reads clearly. This is when you tweak—move a cluster of grapes, angle a cracker slightly differently, adjust until it feels balanced and intentional.
 Pin it
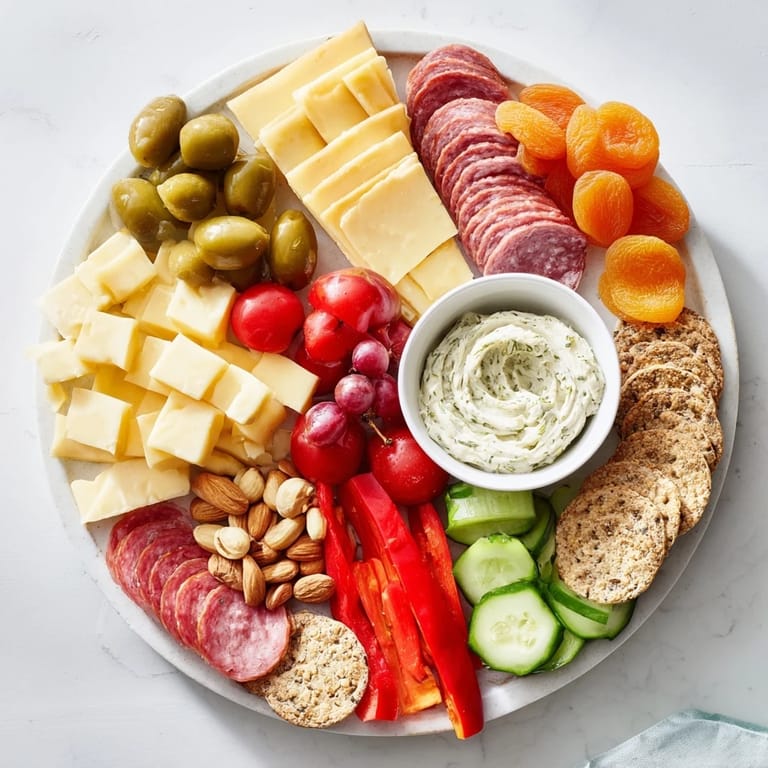
 What surprised me most about creating these directional boards is that they changed how people interacted with the food. Instead of the usual chaos of everyone grabbing randomly, there was this natural choreography. Guests would start at the outer edges and work their way inward, following the visual arrows like they were reading a delicious map. It turned appetizers into an experience, not just a snack.
The Art of Visual Direction
Creating an arrowhead board taught me that food is as much about visual storytelling as it is about taste. When you give your guests a clear visual path, you're not just being thoughtful—you're creating permission for them to enjoy the board in a way that feels natural and guided. The angles, the colors, the flow—they all work together to make people feel welcomed and celebrated.
Building Color and Contrast
I've learned that the magic of a beautiful board lies in contrast. The deep jewel tones of olives against pale brie, the golden warmth of aged cheddar next to the bright green of cucumber, the blush of prosciutto against deep red tomatoes—these combinations aren't accidental. When you're cutting and arranging, think about placing warm next to cool, soft next to firm, light next to dark. The arrowhead direction gives your board structure, but the colors give it soul.
Making It Your Own
Here's what I've discovered: the beauty of a charcuterie board is that it's infinitely adaptable to what you have on hand and what your guests love. The arrowhead concept works with any ingredients—swap in different cheeses, try roasted vegetables instead of raw, use different spreads. The framework is forgiving once you understand the principle. Keep experimenting until it feels like your own expression, because that's when it becomes truly special.
- For vegetarian versions, double up on cheese varieties and roasted vegetables to create more visual interest and substance
- Prep your cuts the night before but don't arrange until serving time—keep everything covered and refrigerated separately
- A sharp cheese knife and a warm knife (dipped in hot water and dried) make slicing and arranging so much easier and more beautiful
 Pin it
 Every time I make this board, I'm reminded that feeding people is about so much more than nutrition. It's about creating moments where everyone feels thought about, where beauty and flavor come together, and where a simple appetizer becomes a memory. This arrowhead board does that effortlessly.
Recipe FAQ
- → How can I create the arrowhead effect?
Position the dip bowl as the focal point, then angle all components—cheeses, meats, veggies, crackers—so their shapes point toward the dip, following a directional layout.
- → What cheeses work best for this board?
Firm and semi-soft cheeses like aged cheddar, brie, and gouda cut into triangles, wedges, and strips create visual interest and directional shapes.
- → How can I adapt the board for vegetarians?
Simply omit meat selections and enhance with additional vegetables or cheese varieties to maintain variety and texture.
- → What dips pair well with this presentation?
Herbed hummus, whipped feta, beet hummus, tzatziki, or whipped ricotta offer fresh, flavorful options that complement the ingredients.
- → How should nuts and dried fruits be arranged?
Scatter nuts and dried fruits along the lines between main components, reinforcing the directional pattern without cluttering the board.
- → What tools are recommended to assemble the board?
Use a large wooden or slate board, paring knife, small bowls for dips, and cheese knives for precise cutting and arranging.