Pin it
 I discovered these Cottage Cheese Chips by happy accident when I was desperately searching for a high-protein snack that wasn't another bland protein bar. Standing in my kitchen one afternoon, staring at an open container of cottage cheese I'd grown tired of eating straight, I wondered if I could transform it into something crispy. The first batch was a complete disaster - soggy little puddles that stuck to the pan. But after a few tweaks to remove moisture and adjusting the oven temperature, these crispy, savory bites became my go-to snack.
Last summer, I brought a batch of these chips to a backyard gathering, tucked into a small container beside the typical chips and dip. My friend Sarah, always skeptical of my healthier creations, reluctantly tried one after I practically insisted. Her eyebrows shot up in surprise, and she immediately reached for more. By the end of the night, people were ignoring the store-bought snacks and asking for the recipe for my strange but addictive cottage cheese chips.
Ingredients
- 2 cups cottage cheese: The higher the fat content, the richer and more satisfying these chips become - I prefer full-fat when I really want them to shine.
- Smoked paprika: This isn't just another spice but the secret weapon that gives these chips a subtle smokiness that keeps people guessing about what makes them so addictive.
- Parmesan cheese (optional): When I have it on hand, this adds an extra dimension of umami that elevates these from good to cant-stop-eating good.
- Dried herbs: Fresh herbs tend to burn in the oven, but dried herbs infuse perfectly - I bounce between oregano and thyme depending on my mood.
Tired of Takeout? 🥡
Get 10 meals you can make faster than delivery arrives. Seriously.
One email. No spam. Unsubscribe anytime.
Instructions
- Prep your workspace:
- Preheat your oven to 350°F and line a baking sheet with parchment paper - trust me on using parchment, as these will stick to foil no matter how much you grease it.
- Drain the moisture:
- This step is non-negotiable - place your cottage cheese in a fine mesh sieve and gently press to remove excess liquid. The drier the mixture, the crispier your chips will become.
- Season and blend:
- Toss everything into your food processor and pulse until mostly smooth but still maintaining some texture. You want to see tiny specks of cottage cheese curds rather than a completely homogeneous mixture.
- Shape your chips:
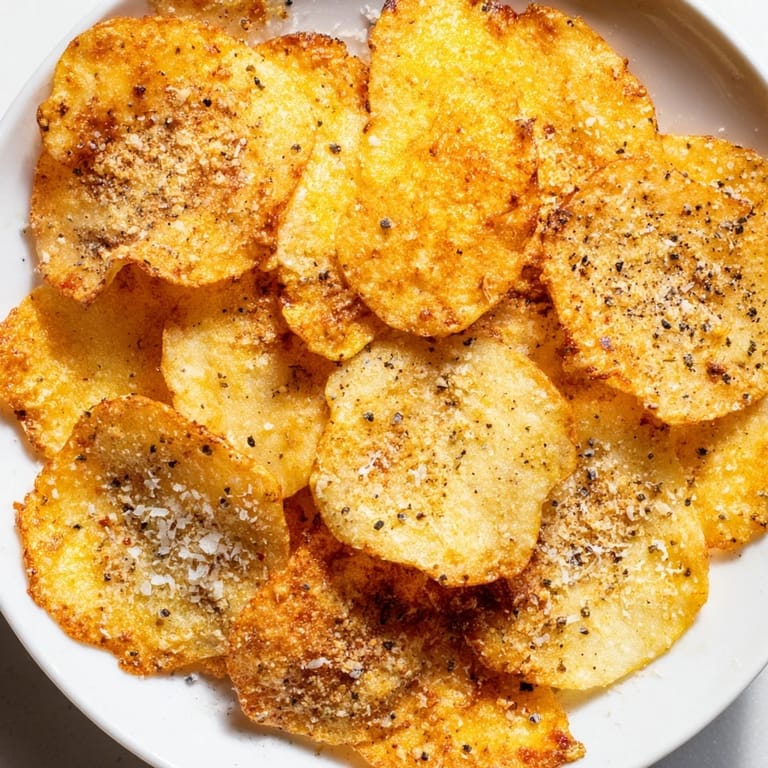
- Drop teaspoons of the mixture onto your baking sheet and flatten them into thin rounds about 2 inches wide. Think pancake thickness - too thick and theyll stay soft in the middle, too thin and theyll burn.
- Bake to golden perfection:
- Slide the tray into your oven for about 25-30 minutes, watching for that moment when the edges turn golden brown and begin to curl slightly. Your kitchen will fill with a savory, cheesy aroma that signals theyre almost ready.
- Cool completely:
- Resist the temptation to immediately sample them. These chips need their cooling time to develop that satisfying crunch as they firm up.
 Pin it
 My teenage son, who usually turns his nose up at anything remotely healthy, wandered into the kitchen one afternoon as I was making these. He absently grabbed a few chips from the cooling rack, and before I could warn him they were my weird cottage cheese creation, he had already declared them amazing. Now he specifically requests them for his after-school snack, completely unaware hes eating something so protein-rich and nutritious. Ive never bothered to correct his assumption that theyre some kind of fancy gourmet cheese crisp.
Flavor Variations to Try
After making these chips dozens of times, Ive experimented with countless flavor combinations beyond the basic recipe. A sprinkle of everything bagel seasoning creates a breakfast-worthy version that pairs beautifully with scrambled eggs. For taco night, I add a teaspoon of taco seasoning to the base mixture and serve them alongside guacamole. And when Im craving something a bit more sophisticated, I fold in finely chopped fresh dill and a touch of lemon zest - perfect for serving alongside smoked salmon at brunch.
Storage Solutions
These cottage cheese chips are at their absolute best fresh from the oven after cooling completely, but I understand the appeal of making a big batch ahead of time. In my experience, they maintain their texture for about two days when stored in an airtight container with a paper towel to absorb any excess moisture. If they begin to soften, five minutes in a 300°F oven brings them right back to life. The microwave is absolutely not your friend here - it turns these crispy delights into sad, chewy disappointments in seconds flat.
Serving Suggestions
While perfectly delicious on their own, these chips truly shine when paired with complementary dips and toppings. The tanginess of the cottage cheese base creates a wonderful contrast with sweeter elements like a roasted red pepper hummus or a drizzle of hot honey. Sometimes I even use them as a protein-packed alternative to crackers on my cheese boards.
- Try them alongside a cool tzatziki dip for a Mediterranean-inspired snack plate that feels both indulgent and wholesome.
- Crumble cooled chips over a salad for an unexpected protein-packed crouton replacement that adds both flavor and textural contrast.
- Serve them with a side of marinara sauce for dipping when youre craving the flavors of pizza without the heavy carbs.
 Pin it
 Every time I make these cottage cheese chips, Im reminded that some of the best recipes come from simple curiosity and a willingness to experiment. They've become more than just a snack in our household - theyre proof that healthy eating doesn't have to be boring or bland.
Recipe FAQ
- → Why is draining cottage cheese important?
Removing excess moisture ensures your chips become crispy rather than chewy. Use a fine mesh sieve or cheesecloth and press gently for best results.
- → Can I make these ahead of time?
Yes, store cooled chips in an airtight container. Re-crisp in a 350°F oven for 2-3 minutes before serving to restore their crunch.
- → What seasonings work best?
The base blend uses garlic powder, smoked paprika, and sea salt. Experiment with dried herbs like oregano or rosemary, or add cayenne for heat.
- → How do I achieve maximum crispness?
Flatten mixture thinly and evenly, bake until edges turn golden brown, then cool completely on the baking sheet. Cooling allows them to crisp further as they set.
- → Are these suitable for dietary restrictions?
Yes, they're naturally gluten-free and vegetarian. High in protein, making them ideal for low-carb and high-protein diets.